
Review
of the Meade LX200R
By
Mark Sibole
ĀĀĀĀĀĀĀ Recently I upgraded to the Meade LX200R
from the old Meade LX200 Classic.
I decided to stay with the same 10
inch diameter scope as I felt the 10 inch scope was the perfect size for
imaging and viewing.
The telescope arrived via UPS. When
it arrives I unpacked it and visually inspected everything .
I checked to make sure all of the
parts were there and there was no damage from shipping.
I then checked the OTA to make sure
the inside was clean and free of dirt and packing materials.
Once this was complete it was time
to change over from the classic model to the LX200R series.
The change over was very simple and
all of the accessories from my old classic fit on the new LX200R OTA.
The mount bolt pattern for the base
on both telescopes were the same too so adding it to my existing pier was no
problem at all.ĀĀĀĀ
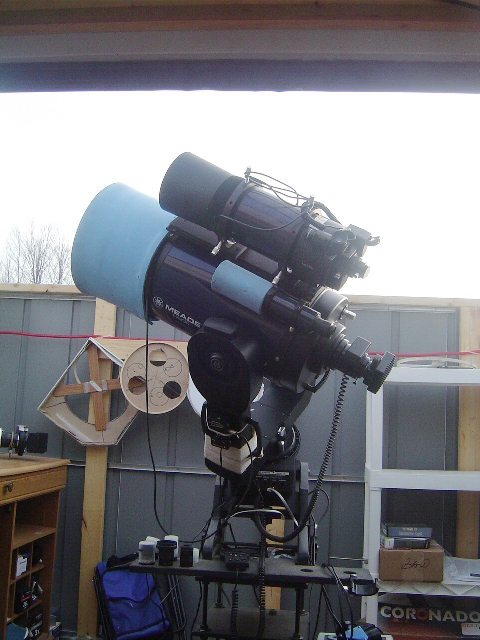
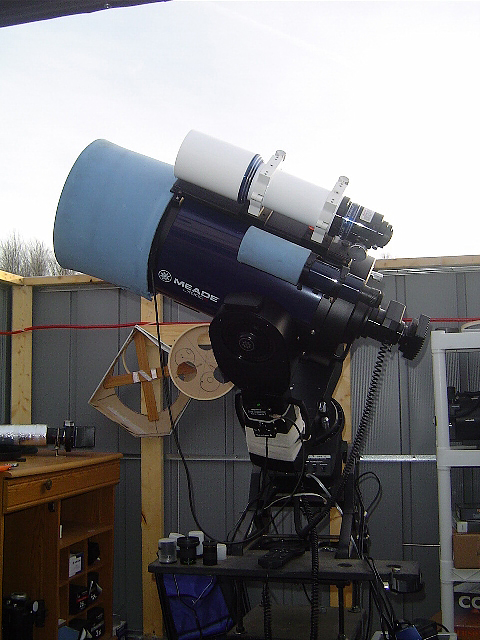
ĀĀĀĀĀĀ I added the Losmandy rail system to the
top of the Telescope so I could use my Meade ETX 125, Meade 80 mm
My widefield camera lens for imaging
or guiding. I also added the Meade counter weight system on the bottom of the
OTA.
When this was all complete, I added
the Meade microfocuser and visual back to the rear of the OTA.
I then added the finder scope and
finder mount to the opposite side of the tube to hold the PST solar scope.
Every thing was easy and straight
forward for adding all of the above mentioned accessories.
ĀĀĀĀĀĀ The first night out was to check polar
alignment and balance of the new setup. Everything went very good and only had
to make
Āa few minor adjustments on the alignment. My
next step was to familiarize my self with the Autostar command set.
After some reading and setting
things up I was set to go.
ĀĀĀĀĀĀ It was now time to select my first
object to view. I selected Vega to check collimation of the telescope.
The telescope slewed to Vega and put
it very close to the center of the finder scope. I then looked in the 26 mm
eyepiece to
Āmake sure it was there and it was on the edge
of the FOV. I synced on Vega to make sure the computer knew where it was.
I noticed right away the very nice
contrast the optics of this telescope provides, and the collimation was right
on.
ĀĀĀĀ
When this was complete I decided to try for M13. I entered M13 into the
keypad and selected goto and a few seconds later I was looking at M13.
M13 looked very bright,Ā crisp and sharp and I could see a lot of nice
detail on this Globular cluster.
This was the extent of my first
night out with the new LX200R.
ĀĀĀĀĀ
The second night out I decided to add the Meade ETX 125 piggybacked, to
use as a guide scope for imaging with the LX200R.
I installed the DSI PRO II to the
LX200R and I used the DSI PRO on the ETX 125 for an autoguider.
Tonight it was time to do a few good
PEC trains for imaging. After 1 PEC train and 4 updates I was confident things
were working well.
ĀĀĀĀ
I went to M74 and centered it on the chip and made my adjustments and
was ready to image.
I turned on the autoguider and
things looked very good until I took my first 2 minute test shot.
I was horrified my stars oblong. I
double checked everything and all seemed to look good at the time.
After another hour or so of trying
to get the telescope to guide well I gave up on it for the night out of
frustration.
ĀĀĀ
The next day I went down to the Observatory and gave the setup a good
look over.
I found my problem. When I installed
the Losmandy rail system I neglected to tighten the rear bolts all the way and
I had flexure in the system.
(shame on me)
ĀĀĀ
ĀĀĀĀĀ
Later in the evening I set up to try imaging again.
I powered up the telescope.
It went through all of the boot up
sequences and received the GPS signal and was good to go. Right out of the park
position I entered M57 this time into the keypad and off we went.
This time M57 was right on the CCD
chip of the DSI PRO II. I took a few minutes to check focus and make sure it
was placed on the chip where I wanted it to be.
I started the guider and locked on a
star. I then took a 2 minute test shot to see how it was tracking and guiding.
The flexture was gone and it looked
very nice. I then went for an eight minute test shot and when it was complete I
had a very nice preview of M57 with nice round tight stars.
I ended up shooting Luminance and
color info for this object tonight.
When I processed the image I was
very surprised to see I captured the rose around the ring.
This was something I was not able to
do with any of my other telescopes.

ĀĀĀ
I was impressed with the contrast and clarity of the image and the
performance of the LX200R.
Over the next few nights I was able
to image NGC 7635,M74,IC410 and M76.
By now I was sold on the performance
and the optics on this telescope.
ĀĀĀĀ
This is truly a very nice telescope with very nice optics.
For visual use right out of the box
this telescope is a winner. For Astrophotography as with any other telescope it
will take a bit of fine tuning but performs very nice.
ĀĀĀ
Pros and cons of this telescope.
The pro's are far more than the cons
in my opinion.
The telescope was very well
columinated from the factory.
The telescope was packaged well for
shipment.
The contrast and optics on this
telescope were impressive.
The mount functioned very well with
accurate GOTO commands.
All of the accessories from the
Classic and GPS model will fit the OTA.
The only con I found on this
telescope is that there was no visual back cover installed to prevent dirt and
debris from entering the OTA.
ĀĀĀ
So from my experience the New Meade LX200R series is a very nice
telescope with very very nice optics and something
you will enjoy for years to come.
Mark Sibole